
A room can have comfortable furniture and a good color scheme yet still feel unfinished. Sometimes, the missing detail is on the walls.
Wainscoting adds shape and texture to the lower part of a wall. It can frame a dining room, give a bedroom a softer backdrop, or bring interest to a plain hallway. These ten wainscoting ideas cover several rooms and styles, from sage green bedroom panels to a simple two-tone living room. Use them to narrow down your look, then plan the height, spacing, and finish before ordering materials.
What Counts as Wainscoting?
Wainscoting is a decorative treatment on the lower portion of a wall, usually finished with a top rail or molding. It describes where the treatment sits, rather than one specific panel style.
There are several ways to create the look:
- Actual panels: Flat or raised panels sit within a frame of vertical and horizontal pieces.
- Applied molding: Thin trim forms rectangles directly on the existing wall. The wall remains visible inside each frame.
- Beadboard: Narrow vertical grooves create a repeating pattern. It comes as individual boards or manufactured sheets.
- Board and batten: Wider flat sections are divided by vertical strips for a simple, structured look.
Full-height paneling belongs to the broader wall-paneling family. It can inspire your design, but it is different from lower-wall wainscoting.
When comparing products, look closely at what is included. A photo of a finished wall may show panels, baseboards, and a top rail that are sold separately.
Choose a Style That Fits Your Room
Start with the details you already have. Look at your doors, baseboards, window trim, and furniture. Simple doors often pair well with flat trim. Next, consider scale. A small room with delicate furniture may look crowded with thick frames and lots of narrow panels. A large room can often carry wider sections without feeling busy.
Check the wall layout, too. Windows, doors, radiators, and built-in cabinets break up the available space. A pattern that looks balanced on one blank wall may become awkward beside a doorway.
Choose the effect you want before choosing materials. Do you want the panels to blend into the room, add gentle texture, or become a bold feature? That decision will guide both your trim and paint choices.
10 Wainscoting Ideas
1. Sage Green Bedroom Paneling
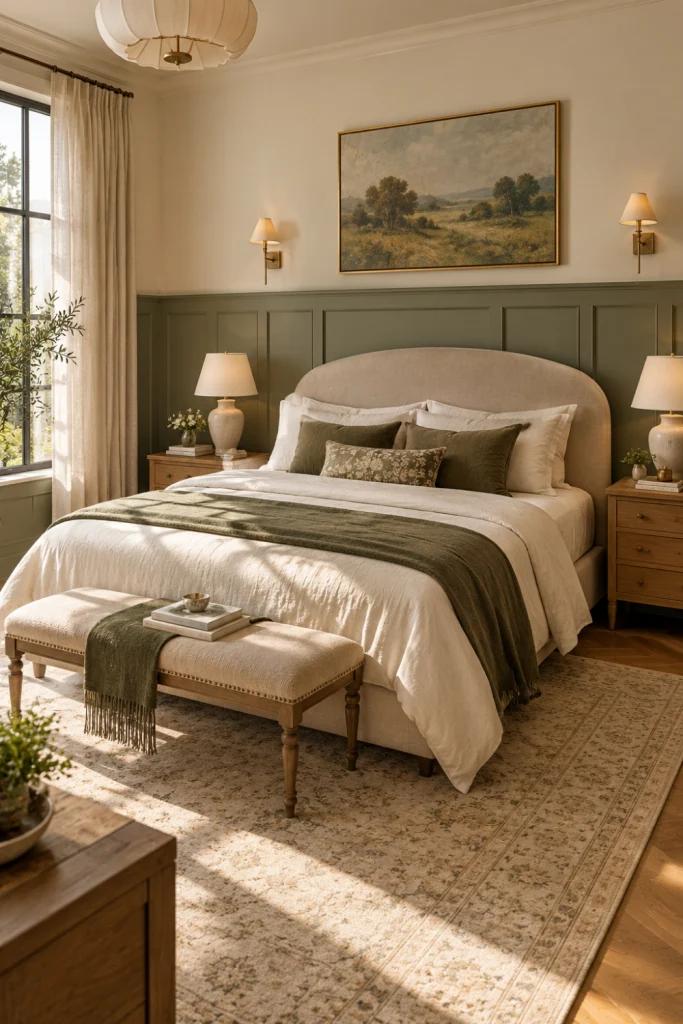
Sage green wainscoting gives a bedroom a soft backdrop while adding more detail than a plain painted wall. Pair it with warm white above, cream bedding, and light wood furniture for a relaxed look.
Simple rectangular frames suit this idea well. Before settling on the layout, check how much of the paneling will remain visible behind your headboard and nightstands. Avoid placing the top rail just barely above the headboard, where the two lines may compete.
Carry a small amount of green into a cushion or throw. You do not need matching green curtains, bedding, and artwork.
Start by comparing sage paint samples beside your bedding and floor. Some greens look gray in one room and yellow in another.
2. Clean-Lined Living Room Wainscoting
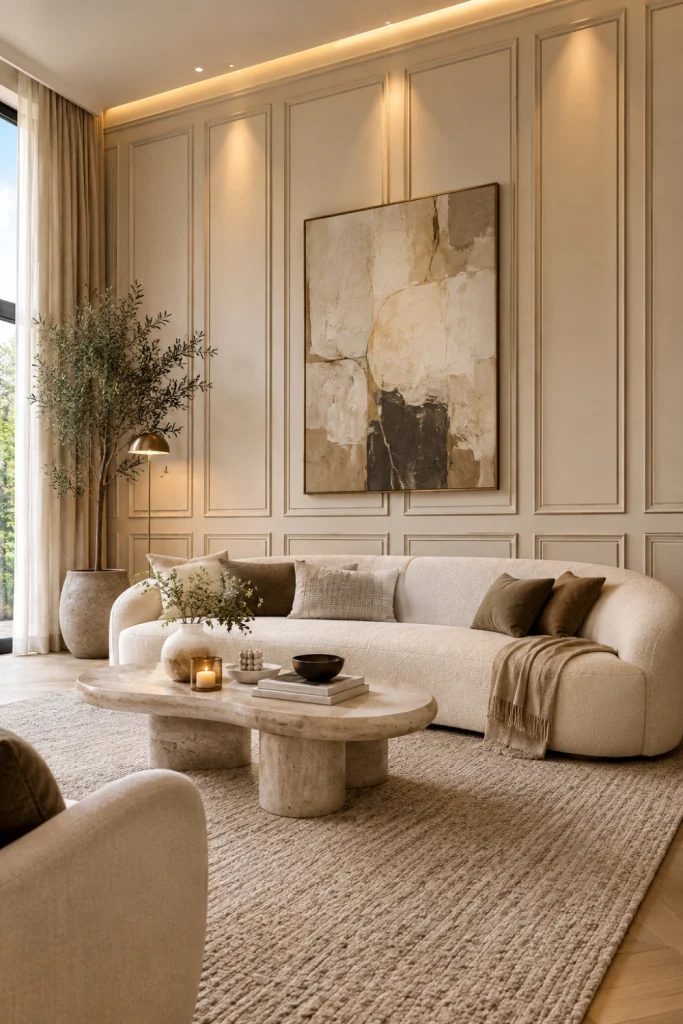
For a modern living room, try flat trim with a simple profile and broad rectangular sections. Paint the trim and lower wall the same color so the pattern shows through light and shadow.
Warm white, pale taupe, or soft gray can work with many furniture styles. Plan around the room’s main wall features. If you have a large window or built-in shelves, use them to guide the pattern rather than forcing identical panels everywhere.
Keep nearby decorations simple. One large piece of art can feel more settled than several small objects competing with the wall frames.
Compare trim samples in person.
3. Modern Wainscoting Color Combinations
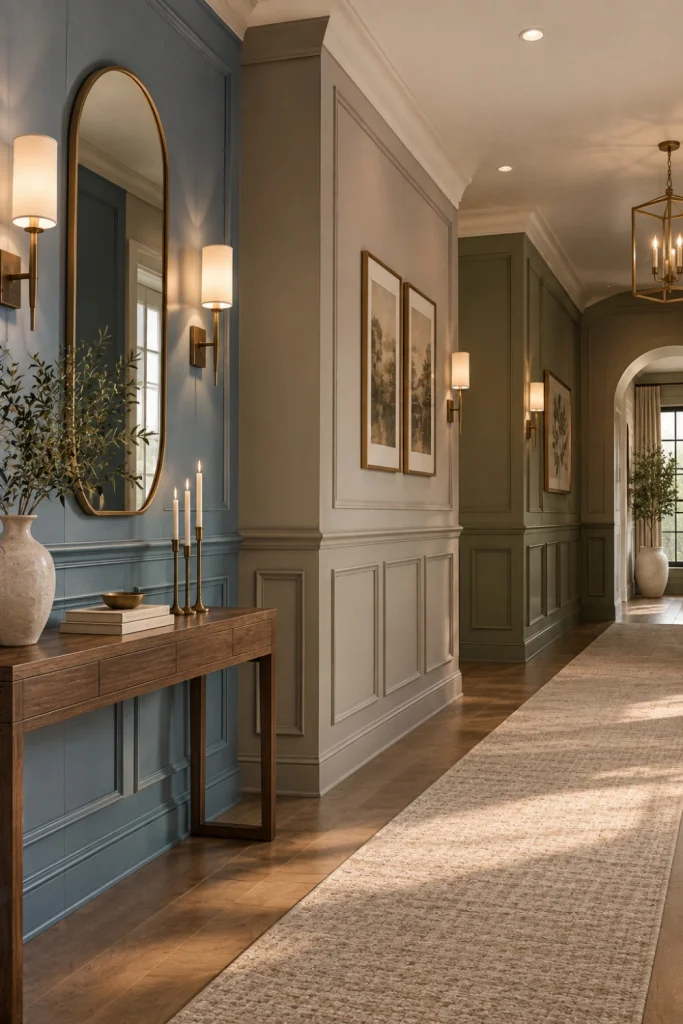
A modern color scheme can be quiet or bold. The key is choosing colors that relate to the room’s fixed features, especially the floor, doors, and large furniture.
Try one of these starting points:
- Warm white and pale taupe: A gentle pairing for a neutral room.
- Muted blue and soft white: A fresh option beside light wood.
- Charcoal and warm ivory: Stronger contrast for a defined lower wall.
- Dusty green and cream: A soft pairing with natural textures.
You can also paint the upper wall and wainscoting the same color. The trim adds depth without a strong dividing line.
➜ Choose two or three sample colors first.
4. Formal Dining Room Wainscoting
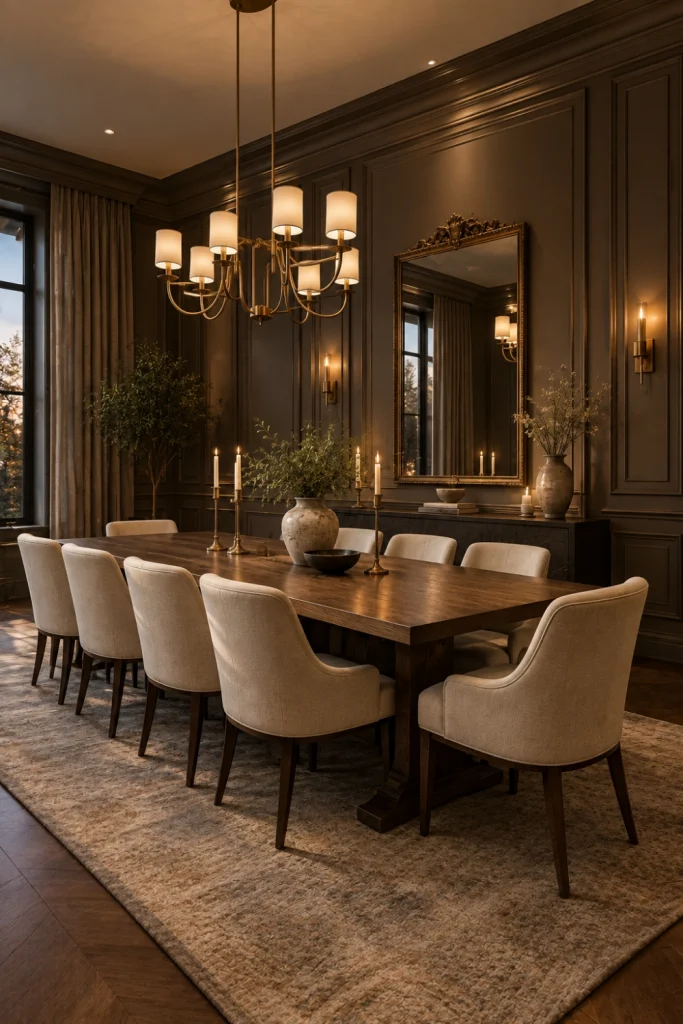
A dining room is a good place for more detailed panels. Raised panels or carefully proportioned molding frames can complement a substantial table and traditional chairs.
For a light look, pair ivory wainscoting with a soft neutral upper wall. For a moodier room, consider deep blue or green below and a lighter shade above.
Keep the panel design connected to your existing trim. Ornate frames may feel out of place beside very plain doors unless other details help tie them together.
If you want wallpaper above the rail, compare a sample with the panel color before ordering. A pattern can look quite different across a whole room.
5. Wainscoting for a Narrow Hallway
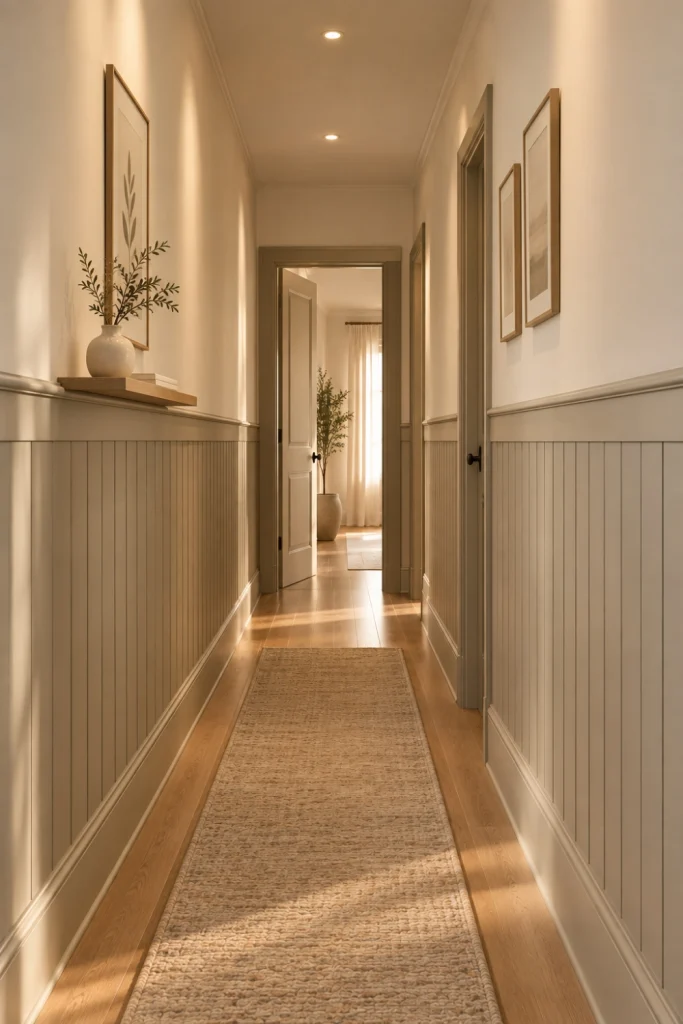
A narrow hallway benefits from a simple pattern. Shallow applied molding or modest beadboard can add texture without taking up much space.
Try a pale color on both the trim and wall for a gentle effect. If you prefer contrast, keep it restrained so each doorway does not become another strong visual break.
Map the full hallway before choosing panel widths. Short stretches between doors may need a different layout from the long wall opposite them.
Check how far the trim will project, especially near door casings and tight corners. The depth matters as much as the pattern.
6. A Welcoming Paneled Entryway
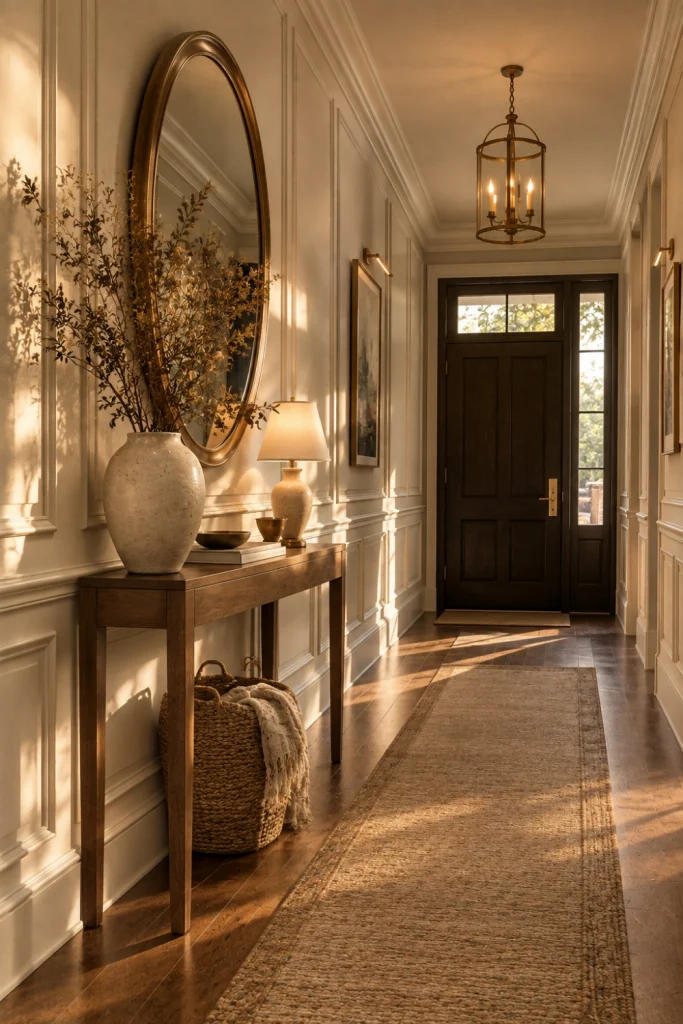
Entryway wainscoting works best when it supports how you use the space. Plan the wall treatment around your bench, console, mirror, and coat storage.
A warm off-white creates a flexible background. Muted olive or blue-gray can add character beside a wood bench or woven basket.
Before choosing the height, check where the mirror and hooks will sit. Leave enough space so these items do not feel squeezed against the top rail. Hooks also need secure mounting suitable for the weight they will hold.
Choose a finish with everyday cleaning in mind, since bags, shoes, and coats often brush against entry walls.
7. Two-Tone Living Room Walls
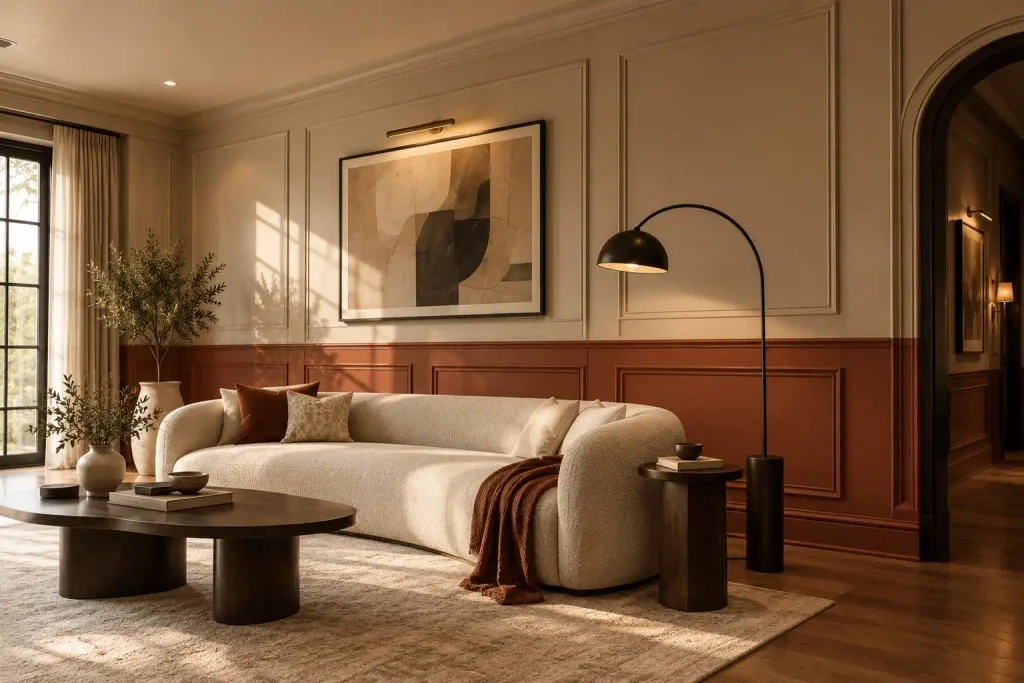
Two-tone walls make the wainscoting line part of the color scheme. A darker lower section can create a defined backdrop for furniture, while a lighter upper wall keeps the contrast clear.
Try taupe below and cream above, or muted blue below and warm white above. Use your rug or sofa as the starting point for choosing the lower color.
Check the division from your usual seating position. A rail that looks good while standing may feel awkward if it sits just above the sofa.
Decide how the baseboards, door trim, and top rail will be painted, too. Matching them to the lower wall creates a continuous block of color. Contrasting trim creates more outlines, so test that effect before committing.
8. Wainscoting Around a Fireplace Area
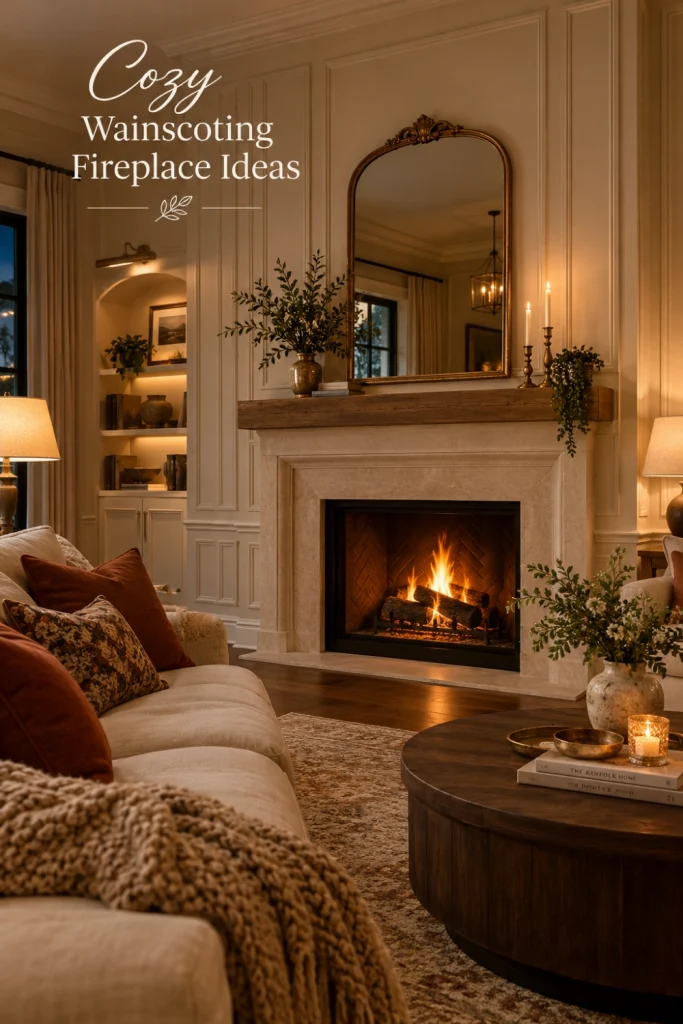
Wainscoting on the walls beside a fireplace can help connect the hearth to the rest of the room. Simple panels may work especially well when the mantel or surround already has strong detail.
Draw both sides before ordering. If one side is wider, aim for a balanced arrangement rather than forcing the same number of panels into unequal spaces.
Choose the color beside the actual brick, stone, or tile. Warm taupe may suit a cream surround, while a soft charcoal can create a stronger frame.
Before planning trim near the appliance, check its installation manual and required clearances. Wood, MDF, and other combustible materials must stay outside restricted areas. Fireplace requirements vary by model, so an inspiration image cannot confirm a safe layout.
9. Wainscoting Behind a Home Office Desk
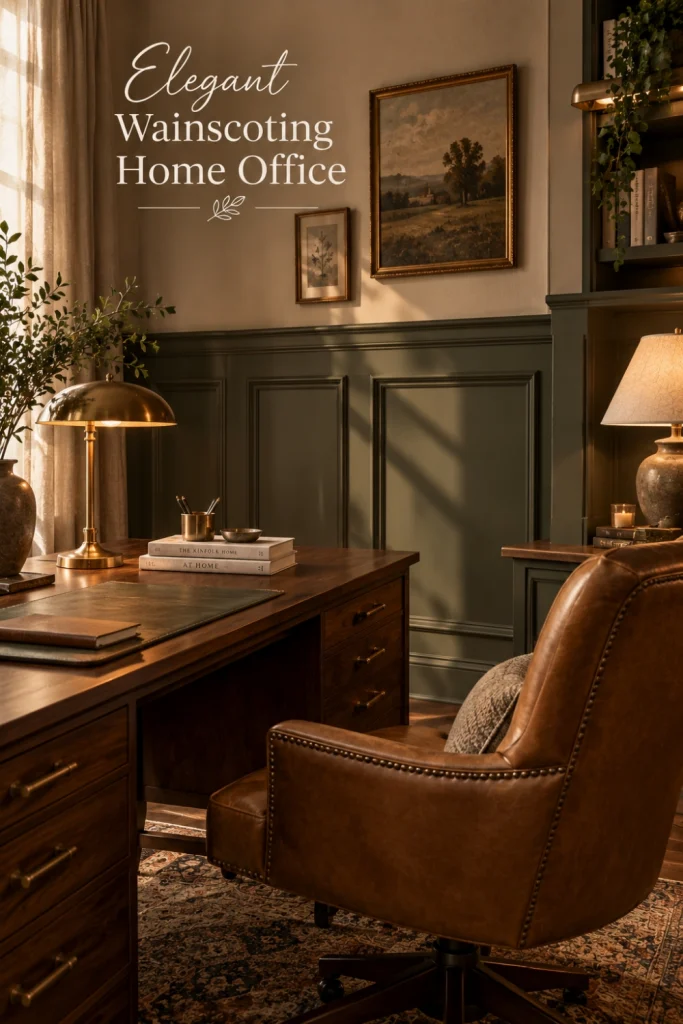
A paneled wall behind a desk gives a home office a clear focal point. Muted green, warm gray, or dusty blue can provide a calm background for work and video calls.
Use a few broad panels rather than a tight grid, especially if the wall will appear on camera. Consider where shelves, artwork, and a desk lamp will sit before finalizing the frames.
Check outlet locations and cable routes early. You should still be able to reach power points without moving the desk or covering sockets with trim.
If you take video calls, test the paint sample through your camera with your usual lighting. Colors can appear different on screen.
10. Staircase Wainscoting
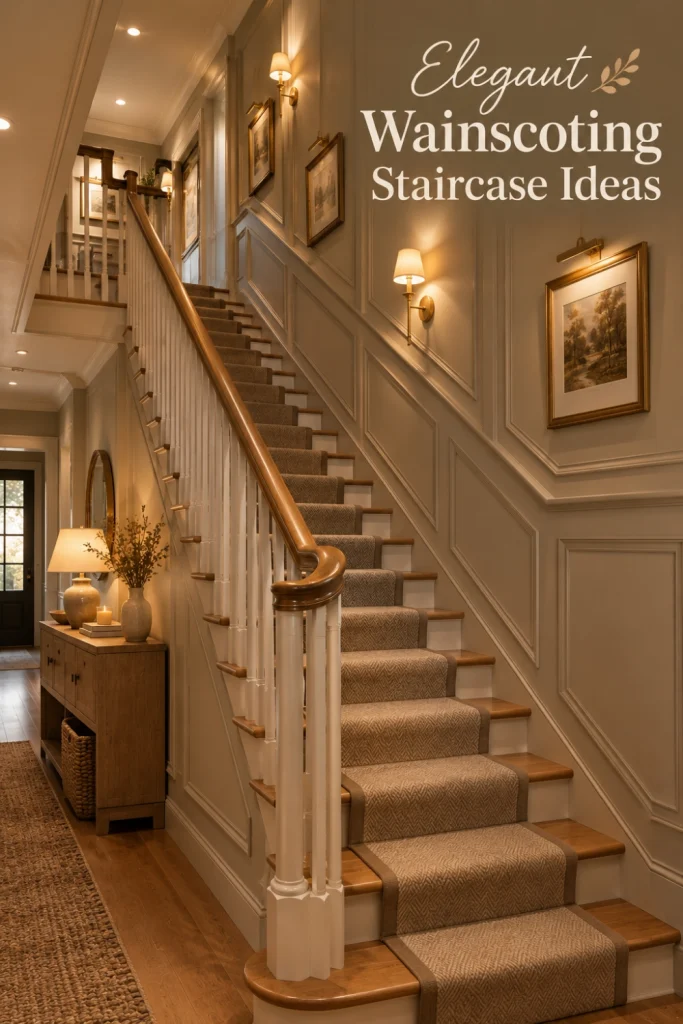
Staircase wainscoting can connect the entry, stairs, and upstairs landing. A simple pattern often works well because the handrail and stair shape already create strong lines.
The sloped wall needs its own layout. Frames may follow the stair angle, then change at the landing. Those transitions should look planned rather than like the pattern suddenly stops.
Try using the same trim profile and color as nearby hallway wainscoting. This gives the spaces a shared detail without requiring identical panel sizes.
Make sure the design leaves room for handrail brackets, switches, and other fixtures. It should not interfere with handrail use or stair access.
For stairs with turns or several landings, ask a finish carpenter to review the layout before buying materials.
How to Plan Height and Panel Spacing
There is no single correct wainscoting height for every room. Ceiling height, furniture, window sills, and the wall pattern all affect the result.
Use painter’s tape to mark a possible top rail. Look at it from the doorway, from a chair, and beside your largest piece of furniture. Try another height if the line feels cramped or cuts across an important feature.
Then tape out the panels. Aim for consistent gaps between frames, while allowing panel widths to respond to the wall. A narrow section beside a door does not have to match a long uninterrupted wall.
Mark outlets, switches, and vents on your sketch. Avoid layouts that leave tiny leftover panels or place trim across fixtures.
Test corners and transitions as well as the main wall.
Choosing Colors and Finishes
Choose paint with your room’s light and materials in mind. Hold physical samples beside the floor, furniture, curtains, and existing trim.
Look at each sample in daylight and under the lights you use at night. Paint a larger sample board when you have narrowed the choice. Move it around the room rather than judging it in one spot.
Sheen affects both appearance and upkeep. Satin or pearl can be worth comparing for frequently touched paneling. Semi-gloss adds more shine, which may also make surface flaws easier to see. Check the paint product’s cleaning and application guidance, since performance varies between products.
If you want different finishes above and below the rail, test them together. The same color can look different when one surface reflects more light.
What to Check Before Ordering Materials
Measure each wall separately, including doors, corners, and short sections. Record the panel sizes and trim lengths on a sketch before making your shopping list.
Confirm these details:
- Material suitability: Check whether the product suits the room’s conditions. Standard MDF should not be treated as waterproof.
- Trim profile: Compare thickness and shape with existing baseboards and door casings.
- Kit contents: Verify whether rails, corner pieces, and base trim are included.
- Surface needs: Read requirements for wall preparation, adhesives, fasteners, and priming.
- Extra material: Allow for cuts and mistakes based on the layout and the supplier’s guidance.
- Full cost: Include paint, finishing supplies, delivery, tools, and any installation labor.
Order a small material sample when possible. A low-priced kit offers little value if its dimensions or finish do not suit your room.
When to Get Installation Help
A finish carpenter can help with uneven walls, detailed corners, stair slopes, and custom panel layouts. Get advice if you are unsure how the material should attach or how existing trim will meet the new work.
For fireplace-adjacent panels, have the proposed layout checked against the appliance’s requirements. Electrical changes should be handled by an appropriate professional.
Ask for a written quote that explains materials, wall preparation, installation, and painting. This makes it easier to compare the complete job rather than just the cost of attaching trim.
If you are renting, confirm permission before making permanent changes.
Your Planning Checklist
Before buying, work through these steps:
- Measure: Record each wall, opening, and fixture.
- Choose: Pick a style that suits your trim and furniture.
- Mock up: Tape the height and panel layout onto the wall.
- Sample: Compare real materials and paint in your room.
- Verify: Check product requirements and difficult transitions.
- Budget: Include finishing supplies and installation help.
- Purchase: Order only after the layout and materials are settled.
Save the idea that feels closest to your home, then adapt it to your walls. A thoughtful layout and a well-chosen color can make even simple wainscoting feel like it has always belonged there.