
Beadboard can give a plain wall the detail it needs without making the room feel busy. Its repeating grooves add texture beside a bathroom vanity, across a kitchen island, or behind a mudroom bench.
But a good-looking panel is only part of the choice. A bathroom wall faces different conditions from a dry hallway. An island needs a finish that can handle shoes and spills. A laundry room needs clear access to appliances and plumbing.
These five beadboard ideas pair attractive looks with everyday use. Start with the room you want to update, then compare materials, trim, and finishes before buying.
Beadboard vs Wainscoting: What Is the Difference?
Beadboard describes a pattern of narrow sections with repeated grooves and small raised details called beads. You can find it in individual boards, strips, or larger sheets.
Wainscoting describes a treatment on the lower portion of a wall. It can use beadboard, flat panels, raised panels, or decorative molding.
So beadboard installed below a top rail can also be wainscoting. Beadboard covering a full wall is still beadboard, but it is usually described as wall paneling.
If you prefer larger framed shapes over narrow grooves, explore our [wainscoting ideas](/wainscoting-ideas/) for another approach.
A Simple Beadboard Accent Wall
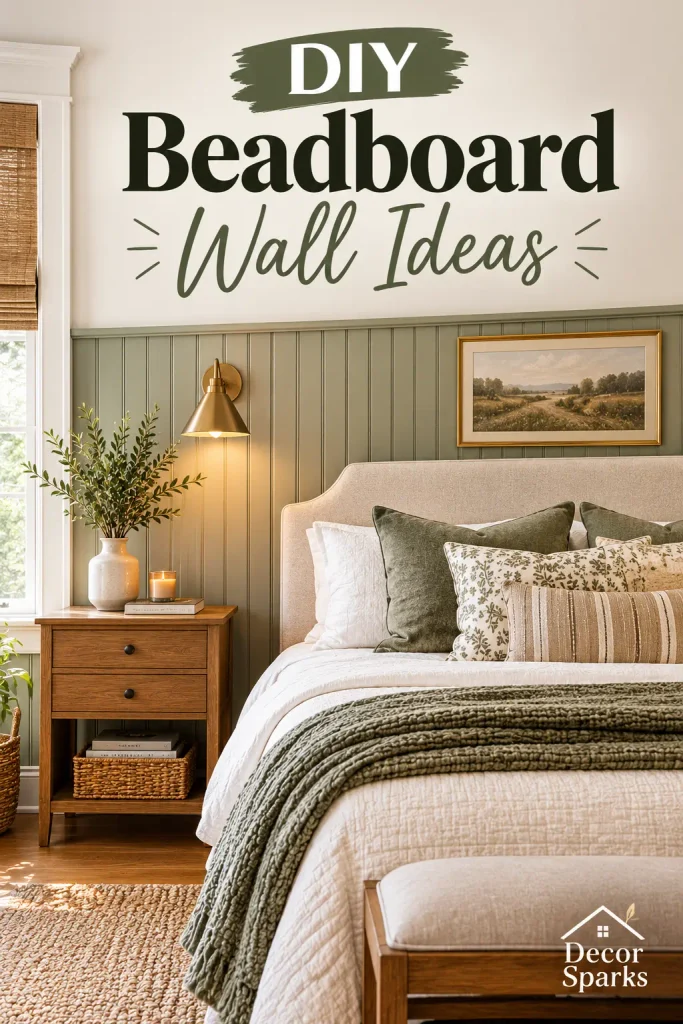
A small wall in a dry bedroom, dining nook, or hallway is a manageable place to explore beadboard. Choose a section with few openings so the pattern has room to show.
For a quiet look, paint the beadboard warm white and pair it with light wood furniture. Muted blue or pale taupe can add more color without taking over the room.
Decide whether you want a lower-wall treatment or a full-height feature. Use painter’s tape to test the boundary before choosing panel lengths.
Check the wall first. Loose paint, damp patches, or uneven areas need attention before they are covered. Also plan how the new panel thickness will meet baseboards and door trim.
Compare samples for groove spacing and depth. A pattern that looks subtle online may feel much busier across a whole wall.
A Cozy Beadboard Bathroom
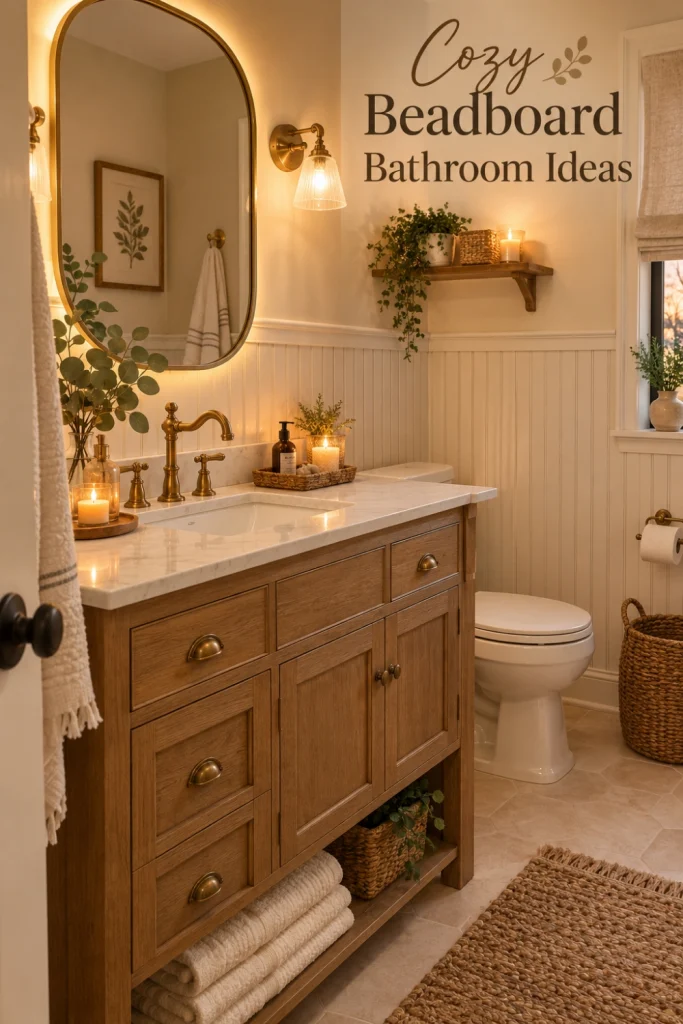
Beadboard below a softly painted upper wall can give a bathroom a comfortable cottage feel. Cream, pale blue, and dusty green pair well with white fixtures and simple towels.
Start with a wall away from direct spray, such as the area beside a vanity or behind a towel rail. Check how close the panels will sit to the sink, tub, and floor, where splashes may reach them.
Choose a product whose manufacturer approves it for those conditions. Some moisture-resistant MDF panels are marketed for humid rooms, but that does not make all MDF suitable for bathrooms.
Keep ventilation and maintenance in the plan. Paneling cannot fix a leak or solve persistent condensation.
For a shower or tub enclosure exposed to direct water, use only a complete system expressly approved for that location. A water-resistant panel alone does not make its joints or the wall behind it waterproof.
Finish with a washable bath mat and a small towel basket placed away from wet areas.
A Beadboard Kitchen Island
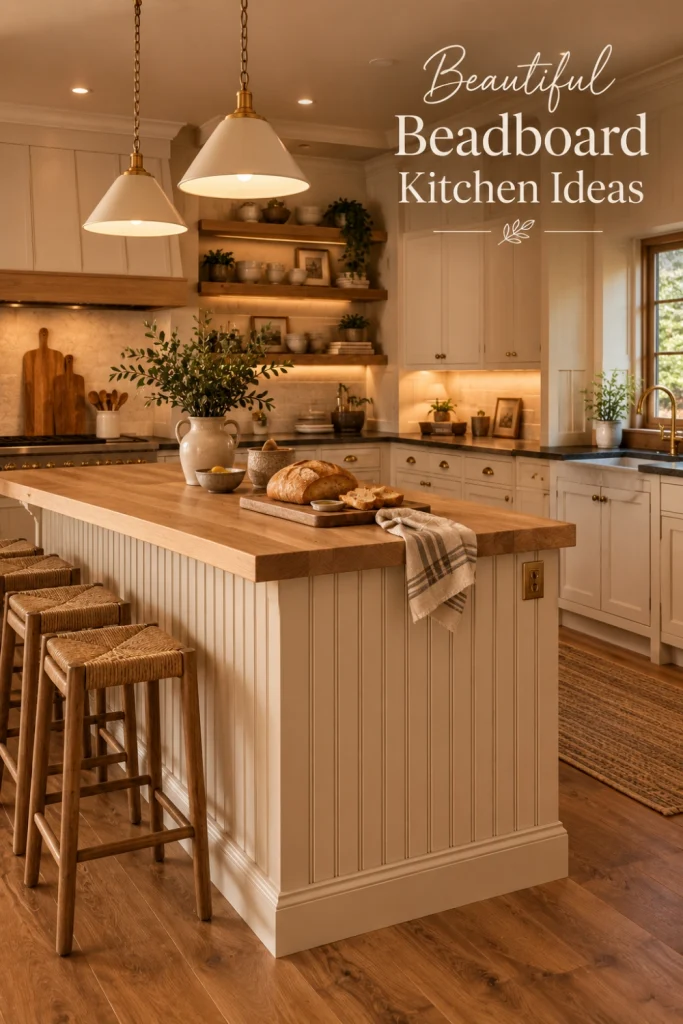
Beadboard on the seating side of an island adds texture where the kitchen often has a large blank surface. It works well beside simple cabinet doors and a countertop with a quiet pattern.
Try matching the island’s existing color for a subtle update. For contrast, consider muted green or blue alongside warm white cabinets.
Check the panel thickness before buying. Added layers and trim can reduce knee space, interfere with stools, or make corners project farther than expected.
Plan exposed corners carefully. They should look finished and suit an area where shoes and chair legs may bump against them.
Choose a surface and finish that can be cleaned according to the manufacturer’s directions. Compare samples for how easily crumbs and marks can be removed from the grooves.
If the island contains outlets, ventilation openings, doors, or service panels, keep them accessible. This idea works best when the detail fits the island’s daily use.
A Practical Beadboard Mudroom
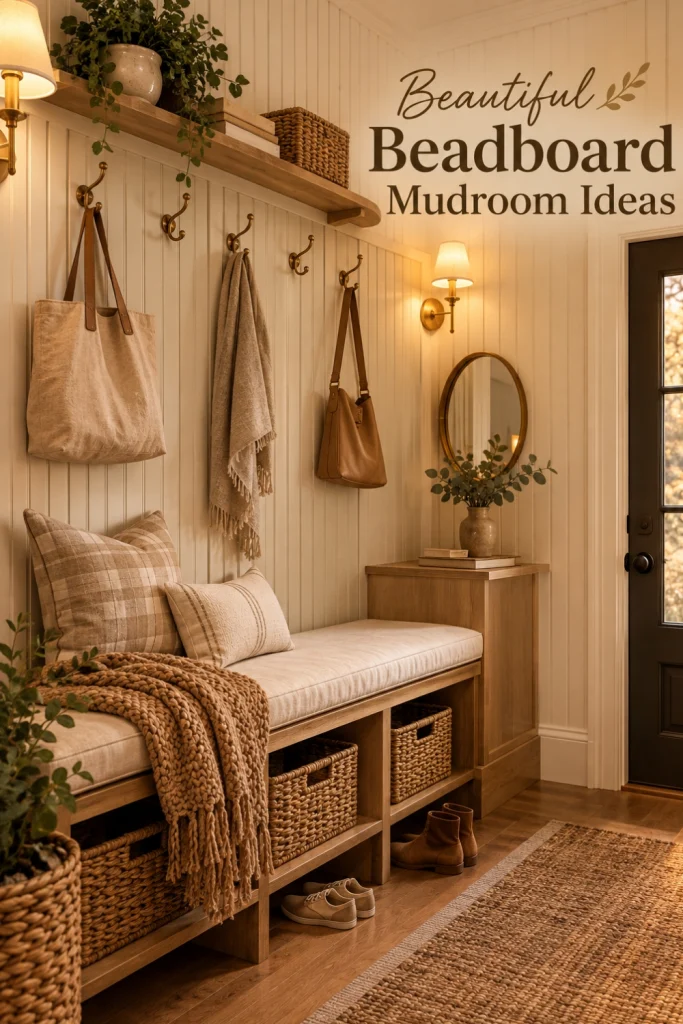
A mudroom needs a place for coats, bags, and muddy shoes. Beadboard can create a neat backdrop for that storage while giving the room a finished look.
Pair pale gray or warm white panels with a wood bench and matching baskets. A deeper blue or green offers more contrast, though it may show dust or scuffs differently. Test a sample near your flooring.
Plan hooks around the people using the room. Lower hooks may help children reach their coats, while higher storage can hold less-used items.
Heavy bags and coats need secure support. Do not assume decorative beadboard alone can carry the load. Hooks and rails must attach to suitable framing, backing, or a rated fixing system.
Leave space for shoes to dry without pressing against the panels. Choose baskets that fit the bench openings and can be removed easily for cleaning.
A Sage Green Beadboard Laundry Room
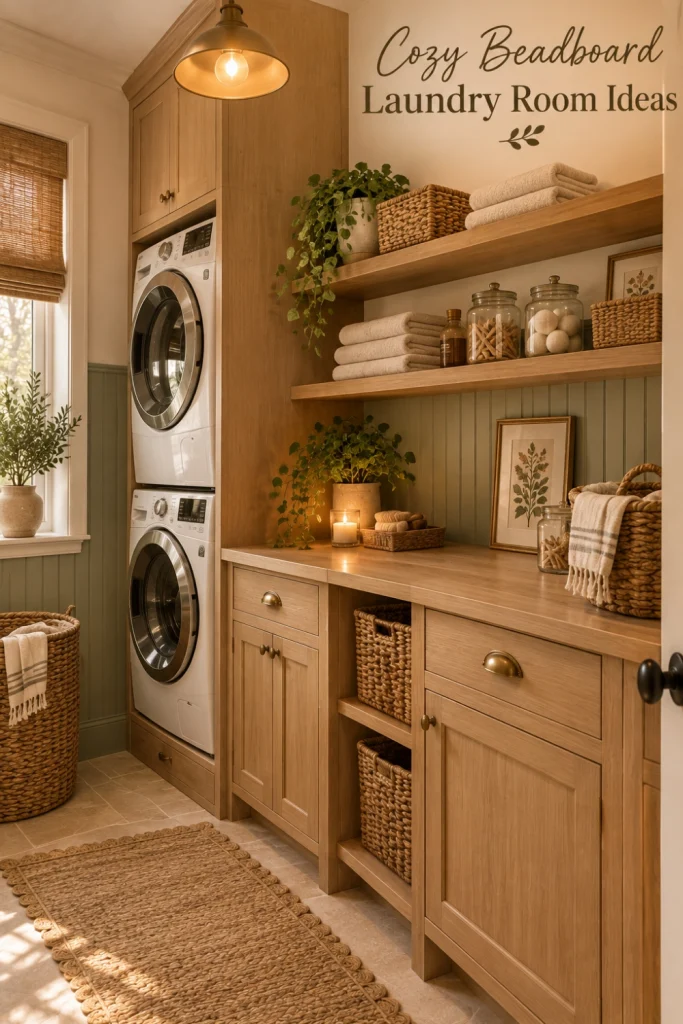
Sage green beadboard brings gentle color to a laundry room filled with white appliances. Pair it with cream walls, a simple shelf, and light wood details for a soft, practical space.
Sample the green beside the washer and dryer. A shade that looks warm in a photo may turn gray under cool utility-room lighting.
Plan the beadboard around appliance clearances, hoses, shutoff valves, outlets, and service access. You should be able to reach these without removing decorative panels.
Keep dryer ventilation and the appliance manufacturer’s required clearances in mind. Shelves and trim should not crowd equipment or block openings.
If the room has a utility sink, check the panel’s suitability for nearby splashes. Fix existing moisture problems before adding wall coverings.
Finish with separate baskets for sorting laundry and closed storage for detergents. Choose storage that leaves the work surface and appliance doors clear.
Compare Materials Before Buying
The groove pattern tells you how beadboard looks. The material and product specifications tell you where it can work.
| Material | What to compare before buying |
| Solid wood | Species, finish, movement allowances, and approved conditions |
| Standard MDF | Approved dry-space uses, edge finishing, and moisture limits |
| Moisture-resistant MDF | Exact humidity and splash allowances for the chosen product |
| PVC or vinyl | Approved locations, fastening, joints, paint restrictions, and heat limits |
Wood can offer natural grain or a painted finish, but product instructions matter when planning for changes in humidity.
MDF provides a smooth surface for paint. Standard and moisture-resistant versions should not be treated as interchangeable. Look for the exact product rating rather than relying on a general “bathroom suitable” label.
PVC and vinyl products also vary. Do not assume every plastic panel is approved for showers, all paint colors, or every installation method.
Ask for samples of both the panel and matching trim. Compare the groove spacing, thickness, finish, and how the pieces meet.
DIY Planning: Before You Cut or Attach Anything
Begin with a sketch of each surface. Measure the width and height in more than one place, since walls and corners may not be perfectly square.
Mark doors, outlets, pipes, hooks, and access panels. Plan where sheet joints or board seams will fall so you do not end up with an awkward narrow strip at one edge.
Inspect the surface underneath, sometimes called the substrate. Confirm that it is sound and suitable for the chosen system. Covering damaged material can hide a problem instead of fixing it.
Read the installation instructions before buying adhesives or fasteners. Requirements for support, material conditioning, gaps, and attachment vary by product.
If panel thickness changes how an outlet box meets the wall, have an electrician assess the work. Avoid fastening where concealed pipes or wiring may be present.
For renters, confirm permission before starting a permanent installation.
Tools and Supplies Checklist
Use this as a planning list, then adjust it to your chosen panel system:
- Tape measure, pencil, level, and painter’s tape.
- Panel and trim samples.
- Beadboard and compatible top, base, and corner trim.
- Cutting tools suitable for the material.
- Adhesive or fasteners specified for the installation.
- Approved filler or sealant where required.
- Primer and paint if the product needs them.
- A brush and roller suited to the coating and groove profile.
- Eye protection, suitable dust protection, and dust-control equipment.
Check what comes in a kit before adding separate trim. Include finishing supplies, delivery, and any hired help in your budget.
Buy painting tools after choosing the coating. Some panels arrive finished, and some products have specific limits on painting.
Mistakes to Avoid
Choosing by appearance alone. A panel that suits a dry accent wall may be a poor match for a splash-prone bathroom. Match the exact product to the location.
Forgetting cut edges and joints. Follow the required treatment for exposed edges, seams, and trim. Paint on the front does not automatically protect the whole panel.
Blocking access. Keep valves, electrical fittings, vents, and appliance service points reachable.
Using panels to support heavy storage. Decorative panels are not a substitute for suitable fixing points for hooks, shelves, or cabinets.
Skipping the instructions. A method used in one DIY video may not suit another material or wall. Confirm attachment and finishing requirements for your own product.
Ordering before testing the layout. Tape out boundaries and compare samples first. Include panel thickness when planning trim transitions.
Save the beadboard idea that suits your room, then build the plan around how you use that space. The best result should be easy to live with as well as pleasing to look at.